Sunday, February 7, 2010

Chocolate Cupcakes with Chocolate Fillings


I did some bakes for the last cg last Sunday. The recipe was really quick and easy to make. However, the chocolate that I used didn't manage to created the "oozing:" effect. I used our usual milk chocolate. It turn out to be more cakey. But nevertheless, it is still nice with the extra chocolate in the centre. Too busy, hence didn't take any photo of the center portion.


Warm molten centered chocolate cake
Recipe from Yochana
(I've tripled the recipe to get 18 standard size muffins, below is the recipe for 12)

120g unsalted butter
120g sugar
2 eggs
180g self-raising flour
2tbsp cocoa powder

Fillings: any chocolate or Ganache

1. Preheat oven to 180 degree.
2. Cream butter and sugar till creamy.
3. Add in one egg at a time and beat till well combined.
4. Add in the sifted flour and cocoa and fold in well,
5. Sppon 1 tablespoon of batter into the liners and add in the chocolate/ganache, follow by another tablespoon of batter.
6. Bake them for about 25 mins.

Saturday, February 6, 2010

Atalie =)

Effects via iPhone apps.

iPhone camera apps

Had so much fun with the camera app from iPhone. Like the effects of it. =)


Friday, February 5, 2010

White Butter Cake


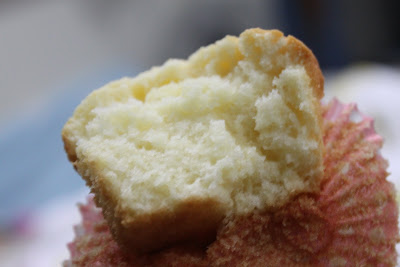
This is definitely a keeper recipe. Another fantastic recipe by Aunty Yochana again. I made them into cupcakes and cakes. It was easy to make and taste delicious. It help me to use up the leftover egg whites from the Kueh Lapis that I've experiment a few days back. It is soft, light, moist!


With the full recipe, I made them into 1 x 4", 1 x 5", 6 cupcakes.

225g. butter
1 3/4 cup sugar
1/2 tsp salt (if you used salted butter, omit salt)
3 1/4 cup cake flour
1 1/2tbsp baking powder
1 cup milk
1 tsp vanilla extract
5 large egg white

1. Preheat oven to 180 degree. Lined a 9" square tin.
2. Sift cake flour with baking powder.
3. Cream butter, salt and sugar till creamy.
4. Add milk and flour alternately into butter mixture by 3 . Add in vanilla extract.
5. Whisk egg white still stiff peak and then fold into the butter mixture.
6. Pour into a 9" square tin and bake at about 60 mins. or till cooked.
7. Cool on wire rack.

Wednesday, January 27, 2010

Victoria sponge sandwich


An easy no fail recipe for me. I made them for a family gathering and everyone loves it. Now my mum "ordered" 8 of them for her to distribute to the relatives and some friends during CNY.

The texture and taste is some where in between butter cake and sponge cake. It is not exactly as rich as butter cake neither it is light as sponge. It has the buttery aroma but not too heavy for your taste bud. Love it with the strawberry jam. It will definitely be better if only I can make my only strawberry jam, perhaps next time.

Victoria Sponge Sandwich
Adapted from Women's Weekly Australia

250g butter, softened
1sp vanilla extract
200g sugar
4 eggs
1/2cup milk
300g self-raising flour
Strawberry jam
Icing sugar

1. Preheat oven to 170 degree. Grease two 8" round tin and line with baking paper.
2. Beat butter, vanilla and sugar until light and fluffy.
3. Beat in egg, one at a time, follow by the milk.
4. Sift in the flour in 2 batches and fold in till just combined.
5. Divide equally into the 2 prepared tin and bake for about 30 mins.
6. Turn the tin top-side up on the wire rack to cool. After cooled, sandwich the sponge with strawberry jam and just with icing sugar.

Brownie muffins

One of my favorite recipe, revisited!


- Posted using BlogPress from my iPhone

Brioche


Recipe was taken from Delicious Days long long time ago. It was orange brioche. The picture posted on the blog just simply looked captivating. I didn't try it out until now, as I didn't venture into bread baking then.


I didn't have any orange at home, hence I replace with apricot, chocolate chips. I made 3 version in total. 1 with apricot, it taste WERID. The chocolate was nice. The plain taste just as good. And most importantly Atalie always loves to eat my bread. hehe.


Here is the adapted recipe.Make 6 standard muffin size.


125 ml lukewarm milk
10g instant yeast
250g flour
35g white sugar
a pinch of salt
1/2 egg
35g melted butter

1. Sieve the flour into a bowl and make a little depression in the middle. Pour the lukewarm milk into the well, add the instant yeast and one teaspoon of sugar. Carefully stir the milk mixture once or twice. 
2.Cover bowl with a kitchen towel and let the pre-dough rise for about 15 minutes, the surface will start to look bubbly.
3. Add the remaining ingredients (sugar, egg, pinch of salt, cooled down melted butter) and use a mixer to knead till it is elastic enough. Add more flour if necessary. 
4. Cover and let proof for about 1 hour or till dough double.
5. Knead dough one more time to release the air. 
6. Cut in equal pieces and form little snow ball sized dumplings. Each ball is bout 72g.
7. Place little paper cups in the holes of a muffin tray. Let rest for 10 mins.

8. Bake at 200°C for about 15 minutes or until the tops turns golden brown. Cover with foil if the tops get too dark too fast.


Monday, January 25, 2010

Durian Mousse Cake


This was the birthday cake made for my mother. Recipe is adapted from Aunty Yochana. I love how easy it was to make the sponge cake. It was literally effortless and turn out beautifully.


The texture of the mousse was great. It was just nice, not too creamy. But mum said could have been more generous with the durian. I told her the durian used was the "mao shan" durian, which is very expensive, cost more than the D24.


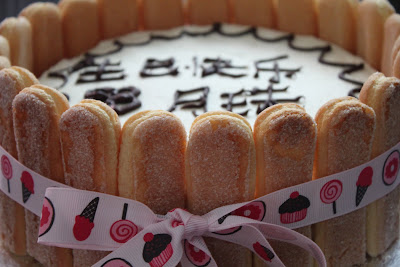
After topping up with another layer of whipping cream, I laid the sides with sponge fingers. Easy and pretty to make!


My mum was really glad for the cake. =)

Here is the adapted recipe.

Vanilla Sponge Cake
100g cake flour
30g. cornflour
25g water
1 tsp baking powder
5 eggs
1 tsp vanilla extract
100g sugar
10g. ovalette (cake stabilizer)
50g corn oil

1. Preheat oven at 175 degree. Line two 8" round tin. (Don't need to grease)
2. Whisk all the ingredients together (except for the corn oil) till thick and fluffy.
3. Add in corn oil and mix till well blended. (I just use the mixed and give it a few good mixed instead of trying fold it carefully.)
4. Pour mixture into two 8" round tin. Bake for about 15 to 20 mins.Remove, turn it top side down and leave it to cool. The sponge will just come off on its own.

Durian Mousse
250 gm. Durian flesh
125 gm. fresh milk
30 gm. sugar
1 pinch of salt
2 eggs
10 gm. Gelatine Powder
20 gm. water
200 gm. whipping cream

1.Boil milk with sugar till sugar dissolves.
2. Whisk eggs and salt lightly and pour in the hot milk mixture. Add in durian flesh and mix till smooth. Off the heat and let it cool completely.
3. Mix gelatine powder with water and let it sit for 5 mins. Microwave for 20 secs. then add into the durian mixture.
4. Whisk whip cream till fluffy. Fold into the durian mixture. Divide mixture into 2 portions.
5. Spread 1 portion of durian mousse onto 1 slice of sponge cake. Then spread the durian mousse again and then top up with the second slice of sponge cake and spread the balance durian mousse on top. Chill in the fridge till set.
6. Decorate cake as desired.

Noted: My mousse turned out to be quite watery. Hence I used a 8" round cake ring to assemble the cake. The sponge shrink slightly after it cooled off. Hence, it is just nice for everything.
- I laid 1 layer of sponge in the cake ring. Pour in the mousse, follow by the 2nd layer, then the remaining mousse. Then I chill till it firm up.


What could possibly went wrong? My durian mixture wasn't cooled completely.
A safe method... Ensure the durian mixture is cooled completely. Chill it in the fridge for 5-10 mins (not longer than that, as it might harden due to the gelatine) before folding into the whipping cream. When folding in, put the mixing bowl over ice water to ensure the temperature is maintain, so that it won't "melt".

Wednesday, January 20, 2010

Blueberry Mini Cupcakes


I had some leftover blueberries and decided to try out one of the recipe that I had for the longest time (it happens all the time). I tried to add in some sweetcorn in replace of the blueberries but it did not turn out nice. Blueberries somehow give the cupcakes an enhanced taste and make it very flavorful.


Here's the source and below is adapted recipe.
Makes 16 mini muffins.


1-1/2 cups cake flour
1/2 cup sugar
1 /2 tsp baking soda
1 tsp baking powder
1 pinch salt
1/2 tsp vanilla
1 egg
1/2 cup sour cream

1/4 cup vegetable oil
1 cups blueberries, (1 pint)
 

1. Preheat oven to 175 degree.
2. Sift all dry ingredients into a large bowl and set aside. In a small bowl toss blueberries with about 1 tablespoon of flour mixture and set aside.
3. Whisk all wet ingredients together and mix well.
4. Add wet ingredients to flour mixture and mix with a wooden spoon until just barely combined. add blueberries and mix lightly
. Do not over mix.
5. With an ice cream scoop fill muffin pan almost all the way to the top. Bake for 20 minutes or until golden brown.


65°C Bread Loaf


This was made using the Water Roux ingredient. The bread was soft and good when eaten on the first day, thereafter you need to toast it before eating. =)


This recipe was taken from Florence. My color somewhat turn our to be different from hers.

65°C Bread Loaf

250g bread flour
1 tbsp milk powder
80g TangZhong
105ml warm water
4g salt
25g sugar
5g dry yeast
25g butter

Method:
1. Put all the ingredients in together. (Please ensure the salt and butter stays away from the yeast)
2. By hand or mixer, knead till it is smooth and elastic. Cover and proof for 45 mins or till it double in size.
3. Knead slightly to release the air. Divide dough into 2 pieces, shape into a long rectangular shape and roll it up swiss-roll style.
4. Place dough pieces into loaf pan and let it prove till about 85% full.
5. Cover the loaf pan with its lid and bake at 175 - 180°C for about 25 - 30 minutes.

Sunday, January 17, 2010

Hokkaido Milky Loaf


Recipe from Imperial Kitchen.
Ingredients:

270 g Bread flour
30 g Cake flour
5 g Dry active yeast
15 g Milk powder
40 g Sugar
4 g Salt
1 pc Egg
125 g Fresh milk
75 g Whipping cream (heavy cream)

Method:

1. Put all ingredient in the mixing bowl. (make sure the salt and yeast are not put together). Use a dough hook and knead till dough form.
2. Continue to knead dough till elastic and smooth.
3. Cover with cloth/cling wrap and proof for 450mins or till double. 
4. After that, knead slightly to release the air. 
5. Roll dough from top down into a longish shape (like swiss roll). Put into a well greased baking tin (7" x 4" x4") and proof for another 45 mins or until double.
6. Brush with milk and bake in preheated oven 170 degree for 40 mins.

Note: I covered the tin to get a square loaf. I think the bread will be even softer if I didn't cover it, so it can raise higher and more air.

Wednesday, January 13, 2010

Happy 2010

A happy new year too all! I am really believing this year will be really good. I'm going to complete my studies in July this year, follow by a BKK trip with family. It will be the first time that Atalie is travelling and get to see the relatives over there.

This is my baking goals for 2010
1. More recipe creations and try out more different types of bakes
2. To find time to take in more orders for those who have been asking for the longest time.( Do drop me a comment/email for enquiries. =))
3. To be able to do baking for every single of my loved ones' birthday
4. Continous improvement in my baking skills especially in terms of decor

Thursday, December 31, 2009

Bread sticks (Pai pau)

I wanted to prepare some bread as snack for Atalie. This is suppose to be cheese stick. But when I am preparing the dough, I realise my cheese had expired, then it became plain bread. It reminds me of the "pai pau" that I saw somewhere before. This recipe is taken from Kitchen Corner. It was very good. Soft and light. I am definitely going to make them again and again. But the next time, I must roll it thinner. Mine becomes a loaf.


Bread stick

195g bread flour
90g plain flour
12g milk powder
30g caster sugar
6g salt
6g yeast
60g beaten eggs
65g water
45g unsalted butter
75g water roux**
Egg wash and cheese

Water Roux**
250g water + 50g bread flour.
Combined water and bread flour in pot over low medium heat. Keep stirring till there is not lumps and resembles baby porridge. Transfer to bowl and cover top with cling wrap to prevent skin from forming. Remaining water roux can be kept in fridge for up to 2 days. If you see grey spots forming, please discard.

1. Put all ingredients (except salt and butter) into mixing bowl and knead. When dough is form, add in salt and butter. Knead till dough is elastic and smooth (about 15 mins).
2. Cover and stand for 40 mins or double in size.
3. Afer 1st proofing, remove from bowl and knead slight. Divide into 9 portion and roll into smooth ball shap. Rest for 10 mins.
4. Flatten dough and roll into longish shape. (if you want a stick type, roll thinner. Else it will become like mine)
5. Place in greased baking tin and proof for another 40 mins. Then brush egg wash over and sprinkle with cheese.
6. Bake in the preheat oven, 180 degree for 15 mins.

2nd Attempt on Bread - Dinner Roll

This is my 2nd attempt on the next day after the white bread roll. It was much successful. It is quite soft. But doesn't keep well on next day.

This will be best served within the day with butter/jam/soups.


Recipe adapted from Women's Weekly Australia.

1tsp instant yeast
1tsp caster sugar
1cup (250ml) warm water
100g plain flour
220g bread flour
1tsp salt

1. Whisk yeast, sugar and water till yeast is dissolve. Cover and stand for abt 15 mins or till mixture is frothy.
2. Sift flour and salt into large bowl. Add in the yeast mixuture.
3. I used my kenwood mixer dough hook to knead. Knead till dough is smooth and elastic (abt 15 mins)
4. Place dough in large greased bowl. Cover and stand for about 1 hour or till dough is double in size.
5. Prepare greased tray. After 1st proofing is done, knead on flour surfact slight. Divide dough into 40g each and shape into balls.
6. Place dough on tray and cut a cross in top and grease the dough lightly.
7. Stand for 20 mins or double.
8. Bake in preheat oven for 15 mins.

1st Attempt on Bread - White Bread Roll

Finally, I embark on the journey of making bread. It is quite easy but time consuming. Have to wait for it to proof.

Below is the bread that I made. I used the recipe from Happy Home Baking. You can find the recipe here.

The bread dough didn't manage to become smooth. Thou the proof works. After baking, it was still soft when its warm but after awhile it become very chewy. The taste of yeast is also very strong.

After kneading.


Finished product.

Monday, December 28, 2009

Atalie's 1st Birthday

The day has finally come and IT is finally out and completed. Yes, Cuen is satisfied with the work. thou there is quite a few hipcups along the way. I think IT has scored 99 marks. I'm talking about the birthday cake for my darling, Atalie. It is her 1st birthday party. I have planned over a period of 2 months on just the cake itself and made it over 3 days. It was really tiring but worth every single bit of effort.


My sketches


I want to thank Lee Lee and Ginny for helping me out on the birthday cake. Thanks so much for sharing with me your precious knowledge. And not to forget my Daddy Hubby who help to take care of Atalie while I'm busy preparing the cake.

Caihui has helped me to prepare a montage but the projector is not working. Hope to post it up on youtube or facebook for viewing.

Process of making the cake.
Day 1, I had to mould all the figurines to ensure it drys on time.


Day 2, I baked the cake and frosted it with chocolate ganache.
Top tier: 6 inch cranberry butter cake. Bottom tier: 8 inch steam moist chocolate cake.


Day 3, assembling of the cake with fondant.


The figurine was tough as the joints of the girl refuses to stick, keep coming on. If you notice closely, as the end of the day, the girl has got no more nose. It dropped off and I'm too tiring to doing anything about it. The sugar paste recipe calls for gelatine foil but I couldn't get it then, hence I replace with gelatine powder. The effect turn out bad, as I was rolling the fondant, I could see the un-dissolve gelatin still there. It was somehow patchy. As my based fondant is white, I had to be very careful as I've used chocolate ganache.

This is the finished and final product.